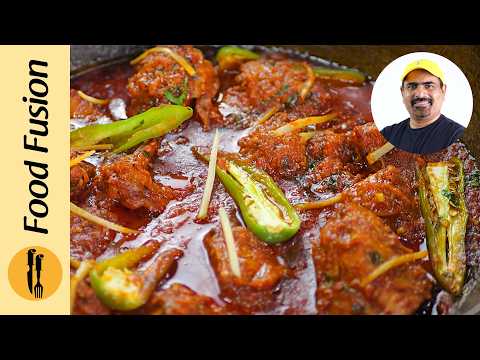
बहुत ही टेस्टी चटपटा ढाबा स्टाइल चिकन मसाला
बहुत ही टेस्टी चटपटा ढाबा स्टाइल चिकन मसाला is a medium Indian recipe that serves 4. 683 calories per serving. Recipe by Cooking With Chef Ashok on YouTube.
Prep: 20 min | Cook: 45 min | Total: 1 hr 20 min
Cost: $11.84 total, $2.96 per serving
Ingredients
- 1 kg Chicken (leg pieces) (cut into bite‑size pieces, skinless preferred)
- 1.5 tsp Salt (adjust to taste)
- 100 ml Vegetable Oil (for frying)
- 1 piece Bay Leaf (whole)
- 1 piece Large Green Cardamom (whole)
- 4 pieces Cloves (whole)
- 1 piece Cinnamon Stick (about 2 inches long)
- 4 pieces Small Green Cardamom (whole)
- 5 pieces Garlic Cloves (crushed)
- 300 g Onion (thinly sliced)
- 100 g Ginger‑Garlic Paste (store‑bought or homemade)
- 0.5 tsp Turmeric Powder (ground)
- 2 tsp Kashmiri Red Chili Powder (mild, gives deep red colour)
- 150 g Tomato Paste (fresh) (blended ripe tomatoes, no added water)
- 1 tsp Coriander Powder (ground)
- 0.5 tsp Cumin Powder (ground)
- 1 tsp Kasuri Methi (dried fenugreek leaves)
- 100 g Fresh Yogurt (plain, not sour)
- 2 pieces Green Chilies (finely chopped, optional for extra heat)
- 1 tbsp Butter or Ghee (for finishing)
- 1 tsp Garam Masala Powder (homemade or store‑bought)
- 2 tbsp Fresh Cilantro (chopped, for garnish)
Instructions
Prepare Chicken
Wash 1 kg chicken pieces thoroughly, cut into bite‑size leg pieces, pat dry and set aside in a bowl.
Time: PT5M
Slice Onions
Thinly slice 300 g onion (preferably into half‑rings).
Time: PT5M
Make Fresh Tomato Paste
Blanch ripe tomatoes, peel, remove seeds and blend to a smooth paste without adding water. Measure about 150 g.
Time: PT10M
Gather Whole Spices
Measure out bay leaf, large cardamom, cloves, cinnamon stick and small cardamom.
Time: PT2M
Heat Oil
Add 100 ml vegetable oil to the kadhai and heat over medium‑high flame until shimmering.
Time: PT2M
Temperature: high flame
Temper Whole Spices
Add bay leaf, large cardamom, cloves and cinnamon stick. Sauté for about 30 seconds until fragrant.
Time: PT30S
Temperature: high flame
Add Garlic
Add the crushed garlic cloves and sauté for 1 minute, stirring continuously.
Time: PT1M
Temperature: high flame
Fry Onions to Light Golden Brown
Add the sliced onions and fry, stirring frequently, until they turn a light golden‑brown colour (about 8 minutes).
Time: PT8M
Temperature: high flame
Remove Excess Oil
Scoop out roughly half of the oil from the kadhai and set aside for later tempering.
Time: PT1M
Add Ginger‑Garlic Paste
Stir in 100 g ginger‑garlic paste and cook for 2 minutes until the raw aroma disappears.
Time: PT2M
Temperature: medium flame
Add Ground Spices
Sprinkle 0.5 tsp turmeric and 2 tsp Kashmiri red chili powder. Stir and cook for 2 minutes on low flame to release colour and flavor.
Time: PT2M
Temperature: low flame
Add Tomato Paste & Salt
Add the fresh tomato paste and 1.5 tsp salt. Cook, stirring, for about 5 minutes until the oil begins to separate from the masala.
Time: PT5M
Temperature: medium flame
Add Dry Herb Powders
Stir in 1 tsp coriander powder, 0.5 tsp cumin powder and 1 tsp kasuri methi. Cook for 1 minute.
Time: PT1M
Temperature: medium flame
Introduce Chicken – High Heat
Add the chicken pieces, increase flame to high and sauté for 2 minutes until the pieces start to turn opaque and release a few bubbles.
Time: PT2M
Temperature: high flame
Cook Chicken Without Water
Reduce flame to medium, cover the kadhai and let the chicken cook in its own juices for 10 minutes, stirring once halfway.
Time: PT10M
Temperature: medium flame
Add Yogurt & Bring to Simmer
Stir in 100 g fresh yogurt, increase flame to high for 1 minute to bring the mixture to a gentle boil, then cover and cook on medium flame for 5 minutes.
Time: PT6M
Temperature: high flame then medium flame
Final Simmer
Turn flame to low, keep the pot covered and let the curry simmer for another 5 minutes so the flavors meld and the chicken becomes tender.
Time: PT5M
Temperature: low flame
Finish & Garnish
Stir in 1 tbsp butter or ghee, 1 tsp garam masala, chopped green chilies and garnish with fresh cilantro. Mix gently and serve hot.
Time: PT2M
Nutrition Facts
- Calories
- 683
- Protein
- 45 g
- Carbohydrates
- 10 g
- Fat
- 45 g
- Fiber
- 2 g
Dietary info: Gluten‑Free, High‑Protein, Keto‑Friendly
Allergens: Dairy (yogurt, butter/ghee)
Ingredient Substitutions
- Instead of Chicken (leg pieces): boneless chicken thighs
- Instead of Salt: sea salt
- Instead of Vegetable Oil: canola oil, sunflower oil
- Instead of Large Green Cardamom: cardamom powder (¼ tsp)
- Instead of Cinnamon Stick: cinnamon powder (¼ tsp)
- Instead of Small Green Cardamom: cardamom powder
- Instead of Garlic Cloves: garlic paste (1 tsp)
- Instead of Onion: shallots
- Instead of Ginger‑Garlic Paste: equal parts minced ginger and garlic
- Instead of Turmeric Powder: fresh grated turmeric (1 tsp)
- Instead of Kashmiri Red Chili Powder: paprika + pinch cayenne
- Instead of Tomato Paste (fresh): canned tomato puree (150 g)
- Instead of Coriander Powder: fresh cilantro leaves for garnish
- Instead of Kasuri Methi: fresh fenugreek leaves (1 tbsp)
- Instead of Fresh Yogurt: Greek yogurt
- Instead of Green Chilies: red chili flakes (½ tsp)
- Instead of Butter or Ghee: extra oil
- Instead of Fresh Cilantro: parsley
Equipment Needed
- Kadhai (deep wok)
- Chef's Knife
- Cutting Board
- Blender or Food Processor
- Wooden Spoon or Spatula
- Measuring Spoons
- Measuring Cup
- Ladle (optional)
- Fine Mesh Sieve (optional)
Critical Steps — Do Not Skip
- Fry onions to light golden brown and remove half the oil
- Cook tomato paste until oil separates
- High‑heat sauté of chicken pieces
- Adding yogurt without curdling
- Final finish with butter, garam masala and fresh herbs
Chef Tips from the Video
- Use Kashmiri red chili powder for vibrant colour without excessive heat.
- Kasuri methi adds a signature smoky fenugreek aroma—crush it between your palms before adding.
- Removing half the oil after frying onions prevents the curry from becoming greasy and leaves oil for a later tempering.
Troubleshooting
Gravy is too watery
Continue cooking uncovered on medium flame until oil separates; you can also add a pinch of cornflour slurry.
Onions burnt and bitter
Reduce flame, stir constantly, and remove the pan from heat as soon as they turn light golden.
Yogurt curdles
Whisk yogurt with a little water before adding and keep the flame low when incorporating it.
Chicken is dry
Do not over‑cook; ensure you cover the pan and keep the flame low for the final 5‑10 minutes.
Storage
Refrigerator: Store in an airtight container for 3‑4 days.
Freezer: Freeze in a freezer‑safe bag for up to 2 months; thaw overnight before reheating.
Room temperature: Do not keep at room temperature for more than 2 hours.
Make-Ahead Tips
- Prepare the fresh tomato paste a day ahead and refrigerate.
- Marinate the chicken with a pinch of salt and turmeric for 30 minutes before cooking for extra tenderness.
- The spice mix (bay leaf, cardamom, cloves, cinnamon) can be toasted and stored for up to a month.
Frequently Asked Questions
What is the cultural significance and history of Dhaba Style Chicken Masala Curry in Indian cuisine?
Dhaba style chicken masala originates from roadside eateries (dhaba) in North India, where cooks create bold, buttery gravies using readily available spices and generous oil. The dish reflects the hearty, comfort‑food ethos of travelers seeking a filling, flavorful meal after long journeys.
What are the traditional regional variations of Dhaba Style Chicken Masala Curry in North Indian cuisine?
In Punjab, the curry is often richer with added butter and a touch of cream, while in Uttar Pradesh cooks may use mustard oil and a higher proportion of whole spices. Some regions add a splash of mustard greens for a tangy twist.
How is Dhaba Style Chicken Masala Curry traditionally served in Indian dhaba culture?
It is typically served piping hot with butter‑topped naan, tandoori roti, or steaming basmati rice, accompanied by a side of sliced onions, lemon wedges and a fresh cucumber raita to balance the richness.
During which occasions or celebrations is Dhaba Style Chicken Masala Curry traditionally enjoyed in Indian culture?
While not tied to a specific festival, it is a popular weekend treat and is often prepared for family gatherings, road‑trip meals, and informal celebrations where a robust, comforting chicken dish is desired.
What makes Dhaba Style Chicken Masala Curry special or unique in Indian cuisine?
The dish’s signature is the deep, caramelized onion base combined with fresh tomato paste and the finishing touch of butter and garam masala, delivering a velvety, slightly smoky gravy that differs from thinner tomato‑based curries.
What are the authentic traditional ingredients for Dhaba Style Chicken Masala Curry versus acceptable substitutes?
Authentic ingredients include fresh tomatoes, Kashmiri red chili powder, kasuri methi, and whole spices like cardamom and cloves. Substitutes such as canned tomato puree, regular red chili powder, or dried fenugreek leaves can be used without drastically altering the flavor profile.
What are the most common mistakes to avoid when making Dhaba Style Chicken Masala Curry at home?
Common errors include over‑frying onions until dark, adding water too early which dilutes the gravy, and cooking yogurt on high heat causing curdling. Also, using too much oil can make the dish greasy.
Why does this Dhaba Style Chicken Masala Curry recipe use Kashmiri red chili powder instead of regular chili powder?
Kashmiri red chili powder provides a vivid red colour and mild heat, allowing the gravy to look restaurant‑style without becoming overly spicy. Regular chili powder would add more heat and a darker hue.
Can I make Dhaba Style Chicken Masala Curry ahead of time and how should I store it?
Yes, the curry can be prepared a day ahead. Cool it quickly, refrigerate in an airtight container for up to 4 days, and gently reheat on low flame, adding a splash of water if the gravy thickens too much.
What texture and appearance should I look for when making Dhaba Style Chicken Masala Curry?
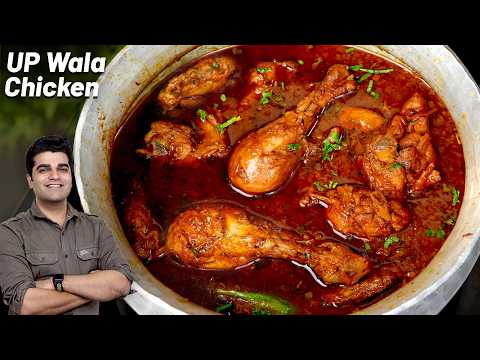
The gravy should be thick, glossy, and coat the back of a spoon, with a deep orange‑red colour. Chicken pieces should be tender, juicy and coated evenly with the masala, without excess oil pooling on the surface.
What does the YouTube channel Cooking With Chef Ashok specialize in?
The YouTube channel Cooking With Chef Ashok specializes in Indian home‑cooking tutorials, focusing on authentic flavors, step‑by‑step techniques, and practical tips for everyday cooks.
How does the YouTube channel Cooking With Chef Ashok's approach to Indian cooking differ from other Indian cooking channels?
Chef Ashok emphasizes dhaba‑style, rustic preparations using simple equipment and explains the reasoning behind each spice addition, whereas many channels focus on restaurant‑style plating or modern fusion twists.
Last updated: September 6, 2026