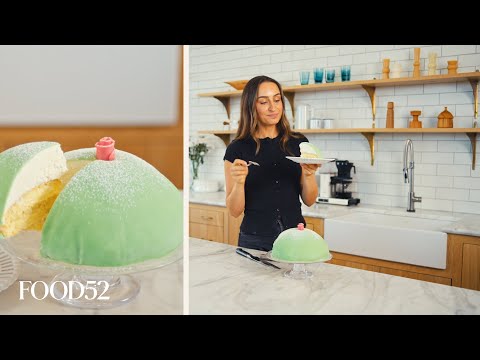
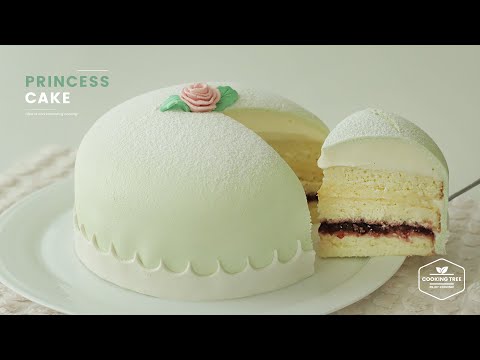
How To Make WICKED Princess Cakes - Nerdy Nummies
How To Make WICKED Princess Cakes - Nerdy Nummies is a medium American recipe that serves 24. 250 calories per serving. Recipe by Rosanna Pansino on YouTube.
Prep: 2 hrs 48 min | Cook: 40 min | Total: 3 hrs 58 min
Cost: $48.00 total, $2.00 per serving
Ingredients
- 3 cups All-Purpose Flour (sifted)
- 2.5 teaspoons Baking Powder
- 0.5 teaspoons Salt
- 2 sticks Unsalted Butter (room temperature, cut into cubes)
- 2 cups Granulated Sugar
- 4 large Eggs (room temperature)
- 1 cup Whole Milk (room temperature)
- 2 teaspoons Vanilla Extract
- 1 teaspoon Almond Extract
- 3 drops Pink Food Coloring (gel or liquid)
- 3 drops Green Food Coloring (gel or liquid)
- 1 cup Unsalted Butter (for buttercream) (softened, cut into cubes)
- 4 cups Powdered Sugar (sifted)
- 2 tablespoons Milk (for buttercream)
- 200 grams Pink Fondant (store‑bought, kept wrapped)
- 200 grams Purple Fondant
- 100 grams Black Fondant
- 1 teaspoon Edible Silver Luster Dust (for sparkle)
- 2 drops Black Food Coloring
Instructions
Combine Dry Ingredients
In a large mixing bowl whisk together the all‑purpose flour, baking powder, and salt until evenly distributed.
Time: PT5M
Cream Butter and Sugar
Using the stand mixer on low then medium speed, cream the room‑temperature butter and granulated sugar for 5‑8 minutes, scraping down the sides occasionally, until the mixture is light and fluffy.
Time: PT8M
Add Extracts and Food Coloring
Add vanilla extract, almond extract, and the pink food coloring to the butter‑sugar mixture and mix for 2 minutes until fully incorporated.
Time: PT2M
Incorporate Eggs
Add the eggs one at a time, mixing on low speed just until each egg is blended. Do not over‑mix.
Time: PT3M
Alternate Dry Ingredients and Milk
With the mixer on low, add one‑third of the dry flour mixture, then one‑third of the milk. Repeat two more times, ending with the remaining dry flour. Mix just until smooth.
Time: PT5M
Divide and Color Batter
Split the batter evenly into two bowls. Add pink food coloring to one bowl and green food coloring to the other, mixing each until the color is uniform.
Time: PT5M
Bake the Cakes
Preheat the oven to 325°F. Grease and line the two small princess pans (fill about ½ full) and the large pan (fill about ¾ full). Pour the pink batter into the small pans and the green batter into the large pan. Bake the small cakes for 30 minutes and the large cake for 40 minutes, or until a toothpick inserted in the center comes out clean.
Time: PT40M
Temperature: 325°F
Cool the Cakes
Allow the cakes to cool in the pans for 10 minutes, then turn them out onto a cooling rack and let them cool completely (about 20 minutes).
Time: PT30M
Prepare American Buttercream
In a clean bowl, beat the softened butter until creamy. Gradually add sifted powdered sugar, 1 cup at a time, mixing on medium speed. Add milk and vanilla extract, and beat for another 2‑3 minutes until the frosting is light and spreadable. Divide and tint portions pink and green as needed.
Time: PT10M
Crumb Coat and Chill
Place a thin layer of buttercream on each cake to lock in crumbs, then refrigerate for 20 minutes to set.
Time: PT20M
Carve Cake Layers for Dress Shape
Using a large serrated knife, carve the top two layers of each cake to create a slimmer silhouette for the fondant dress. Work slowly and keep the knife angled to achieve smooth cuts.
Time: PT15M
Roll and Cut Fondant Pieces
Roll each fondant color to about 1/8‑inch thickness. Using the provided templates, cut out the dress bodice, skirt, cape, and decorative ruffles. Keep excess fondant wrapped to prevent drying.
Time: PT20M
Apply Fondant Dresses
Gently press the fondant pieces onto the carved cake layers, starting with the bodice at the base and working upward. Use a fondant smoother to eliminate air bubbles and ensure a tight fit.
Time: PT30M
Add Luster Dust and Painted Details
Using a small brush, dust edible silver luster dust over the fondant dresses. Then, with a fine brush, paint black food coloring in side‑to‑side strokes to create lace‑like detailing. Finish with additional luster dust on the painted areas for sparkle.
Time: PT10M
Final Assembly and Serve
Place the finished cakes on a serving platter, insert the themed dolls, and add any final decorative touches. Slice and serve at room temperature.
Time: PT10M
Nutrition Facts
- Calories
- 250
- Protein
- 3g
- Carbohydrates
- 35g
- Fat
- 12g
- Fiber
- 1g
Dietary info: Vegetarian
Allergens: Gluten, Eggs, Dairy
Last updated: July 15, 2026